Every Skyrim player has been there: standing in front of a Master-level lock with zero lockpicks left, the treasure chest of your dreams just out of reach. Whether you’ve burned through your entire stash on a particularly stubborn lock or simply want to skip the tedium of hunting down vendors, knowing the lockpick item ID and how to use console commands can save hours of frustration.
The lockpick item ID in Skyrim is one of the most searched console commands for good reason. It’s quick, it’s effective, and it lets players get back to the actual fun, exploring dungeons, looting treasure, and building their perfect thief character. This guide covers everything from the basic item ID to advanced lockpicking mechanics, common troubleshooting, and alternative methods for players who prefer a more immersive approach.
Whether you’re a console command veteran or a first-timer, this walkthrough will get you picking locks like a master thief in no time.
Table of Contents
ToggleKey Takeaways
- The Skyrim lockpick item ID is 0000000A, and you can spawn unlimited picks using the console command player.additem 0000000A [quantity].
- Access the console by pressing the tilde (~) key, and use the correct syntax with proper spacing to avoid execution errors.
- Master locks require precision targeting of the sweet spot, but the Unbreakable perk at Lockpicking skill 100 eliminates resource management entirely.
- Alternative methods like purchasing from merchants, looting dungeons, and joining the Thieves Guild provide immersive ways to stock up without console commands.
- The Skeleton Key, obtained during the Thieves Guild questline, functions as an unbreakable lockpick but prevents questline completion if retained.
- Using console commands disables achievements temporarily on PC, but reloading your save restores them for future sessions.
What Is the Skyrim Lockpick Item ID?
The lockpick item ID in Skyrim is 0000000A. This eight-character code is what the game uses internally to identify lockpicks in your inventory. When you enter this ID into the console command window along with the proper syntax, the game instantly adds lockpicks to your character.
This ID is universal across all versions of Skyrim, including the original release, Special Edition, and Anniversary Edition. It doesn’t matter if you’re running a vanilla game or have 200 mods installed, 0000000A will always refer to lockpicks.
It’s worth noting that lockpicks are weightless items in Skyrim, so you can carry as many as you want without affecting your carry capacity. This makes them perfect for console command spawning, since there’s literally zero downside to having a few hundred in your inventory.
How to Use Console Commands in Skyrim
Opening the Console Command Window
Accessing the console command window in Skyrim is straightforward but PC-exclusive. Console commands aren’t available on PlayStation, Xbox, or Nintendo Switch versions of the game, this is a PC-only feature.
To open the console:
- Press the tilde key (~) on your keyboard. This key is typically located below the Escape key and to the left of the 1 key.
- The game will pause, and a gray text box will appear at the bottom of your screen.
- Your cursor will change to a blinking underscore, indicating the console is ready for input.
If pressing the tilde key doesn’t work, you might have a non-US keyboard layout. Try these alternatives:
- UK keyboards: Press the grave accent key (`)
- German keyboards: Try the ^ key
- French keyboards: Press ² or ù
Once the console is open, you can type commands directly. To close it, press the tilde key again.
Basic Console Command Syntax
Console commands in Skyrim follow specific formatting rules. Getting the syntax wrong means the command won’t execute, so accuracy matters.
The basic structure for adding items is:
player.additem [Item ID] [Quantity]
Here’s what each part means:
- player.additem – This tells the game to add an item to the player character’s inventory
- [Item ID] – The eight-character code for the specific item (like 0000000A for lockpicks)
- [Quantity] – The number of items you want to add
Spacing is important. There should be a single space between “player.additem,” the item ID, and the quantity. Don’t use commas, semicolons, or extra spaces.
Console commands are not case-sensitive, so “player.additem” and “PLAYER.ADDITEM” work identically. Most players stick with lowercase for convenience.
How to Add Lockpicks Using the Console Command
Step-by-Step: Adding Lockpicks to Your Inventory
Now for the main event, actually spawning lockpicks into your inventory. This process takes about five seconds once you know the steps.
- Open the console by pressing the tilde key (~)
- Type the command:
player.additem 0000000A 100 - Press Enter to execute the command
- Close the console by pressing the tilde key again
Your character will now have 100 lockpicks added to their inventory. You can verify this by opening your inventory and checking the “Items” tab, where lockpicks appear.
The command executes instantly, there’s no animation, sound effect, or confirmation message. The lockpicks simply appear in your inventory. If you don’t see them, double-check your syntax for typos.
Adjusting the Number of Lockpicks
The beauty of console commands is flexibility. That “100” in the command isn’t set in stone, you can request any number of lockpicks you want.
Want just 10 lockpicks for a realistic feel? Use:
player.additem 0000000A 10
Need 1,000 lockpicks to never worry about running out again? Go for:
player.additem 0000000A 1000
There’s technically no hard cap on the quantity, but extremely high numbers (like 999,999) can occasionally cause visual glitches in your inventory. Sticking to reasonable amounts like 100-500 is usually the sweet spot.
Some players like to roleplay their lockpick usage, spawning small batches of 20-30 picks when they “visit a town” to simulate purchasing them. Others just give themselves 500 and forget about it. The choice depends on how you want to play.
Alternative Methods to Get Lockpicks in Skyrim
Purchasing Lockpicks from Merchants
If you prefer playing without console commands, lockpicks are readily available from various merchants throughout Skyrim. They’re inexpensive and most vendors restock them regularly.
General goods merchants are your best bet. Nearly every town has at least one:
- Belethor’s General Goods in Whiterun (Belethor)
- Bits and Pieces in Solitude (Sayma)
- Pawned Prawn in Riften (Bersi Honey-Hand)
- The Drunken Huntsman in Whiterun (Anoriath or Elrindir)
Lockpicks cost 5 gold each, and most merchants carry 15-30 at a time. Merchant inventories reset every 48 in-game hours, so you can fast travel away, wait two days, and return to buy more.
Khajiit caravans also sell lockpicks. These traveling merchants set up camp outside major cities and typically stock 20-40 lockpicks. There are three caravan groups that travel between cities, making them reliable sources if you’re already on the road.
Finding Lockpicks in the Game World
Lockpicks spawn as loot throughout Skyrim, though they’re not as common as potions or gold. Knowing where to look can keep your inventory stocked without spending a septim.
The best places to find lockpicks:
- Dungeon chests and urns – Especially in bandit camps and Dwemer ruins
- Thief NPCs – Bandits and thieves often carry 1-5 lockpicks
- Nightstands and dressers – Check every piece of furniture in inns and homes
- Satchels and knapsacks – The small bags scattered in dungeons frequently contain lockpicks
Lockpicks also appear as random loot on corpses. After clearing a bandit camp, loot every body, you’ll usually walk away with 5-15 picks.
The Thief Stone doesn’t increase lockpick drops, but it does boost your Lockpicking skill gains by 20%, making each pick more effective through better control.
Joining the Thieves Guild
The Thieves Guild questline offers the most lockpick-friendly perks in the game. While membership doesn’t give you infinite picks, it provides consistent access and valuable training.
After joining the guild:
- Tonilia sells lockpicks at the guild headquarters in Riften’s Ratway
- Training is available from Vex, who can raise your Lockpicking skill up to level 90
- The Skeleton Key becomes available during the “Blindsighted” quest (more on this later)
The guild’s fences also buy your stolen goods, making it easier to turn dungeon loot into gold for more lockpicks. It’s a self-sustaining economy for dedicated thieves.
Many players who specialize in stealth builds consider the Thieves Guild questline essential, not just for lockpicks but for the armor, weapons, and passive bonuses the guild offers. Completing special jobs in each hold unlocks additional merchants and improves the guild’s capabilities.
Understanding Lockpicking Mechanics in Skyrim
Lock Difficulty Levels Explained
Skyrim’s locks come in five difficulty tiers, each requiring different levels of precision and Lockpicking skill. Understanding these tiers helps you decide which locks are worth attempting with limited picks.
Novice locks (white) are the easiest. The sweet spot is wide, and you can often brute-force them even with low Lockpicking skill. These appear on minor chests, doors, and display cases. Players with base Lockpicking skill can usually open these with 1-2 picks.
Apprentice locks (green) introduce slightly more difficulty. The sweet spot narrows, requiring more careful positioning. Most early-game locked doors and chests use this tier. Expect to use 2-4 picks without perks.
Adept locks (yellow) represent the mid-game challenge. The sweet spot is roughly 30-40% narrower than Apprentice locks. These guard valuable loot in dungeons and shops. Without perks, you might burn through 5-10 picks learning the position.
Expert locks (orange) demand precision. The sweet spot is small, and incorrect attempts break picks almost instantly. Many shops and wealthy homes use Expert locks on their best containers. Budget 10-15 picks per lock without the right perks.
Master locks (red) are the endgame challenge. The sweet spot is tiny, sometimes only a 10-15 degree range. These protect legendary loot, treasury rooms, and special quest items. Without perks and practice, you can easily burn through 20+ picks on a single Master lock.
Your Lockpicking skill level affects the size of the sweet spot. At skill level 100, even Master locks have noticeably larger sweet spots than at skill level 15. Some players report that investing in Skyrim perk codes offers faster progression through the skill tree.
The Lockpicking Skill Tree and Perks
The Lockpicking skill tree contains six perks designed to make the minigame easier and more rewarding. Investing in these perks dramatically reduces lockpick consumption.
Novice Locks (no skill requirement) – Unlocked by default, allows picking Novice locks.
Apprentice Locks (skill 25) – Unlocks the ability to pick Apprentice-level locks.
Adept Locks (skill 50) – Enables picking Adept locks.
Expert Locks (skill 75) – Grants access to Expert locks.
Master Locks (skill 100) – The final tier, allowing you to pick Master locks.
Quick Hands (skill 40, Apprentice Locks) – Lets you pickpocket equipped weapons. Not lockpicking-specific, but useful for thieves.
Wax Key (skill 50, Adept Locks) – Automatically gives you a copy of a key if one exists for a lock you’ve picked.
Golden Touch (skill 60, Adept Locks) – Find more gold in chests (potentially 50% more).
Treasure Hunter (skill 70, Golden Touch) – 50% greater chance of finding special treasure.
Locksmith (skill 80, Expert Locks) – Locks are 50% easier to pick (the sweet spot is significantly wider).
Unbreakable (skill 100, Locksmith) – Lockpicks never break. This is the holy grail perk for thieves.
The Unbreakable perk essentially makes lockpick quantity irrelevant. Once you hit skill 100 and unlock this perk, a single lockpick lasts forever. Until then, stockpiling picks through console commands or merchants is the smart play.
Interestingly, the Lockpicking skill tree is one of the few in Skyrim where the final perk completely eliminates resource management for that activity. It’s comparable to reaching 100 in Enchanting and never needing soul gems again, except Enchanting still requires gems, while Unbreakable literally makes you immortal in lockpicking terms.
Advanced Lockpicking Tips and Tricks
Using the Skeleton Key
The Skeleton Key is an unbreakable lockpick obtained during the Thieves Guild questline. Unlike regular lockpicks, it never breaks, meaning you can fumble around Master locks indefinitely until you find the sweet spot.
You receive the Skeleton Key during the quest “Blindsighted,” roughly halfway through the Thieves Guild storyline. The catch? You’re supposed to return it during the quest “Darkness Returns.” But here’s the thing: you don’t have to.
Many players choose to keep the Skeleton Key permanently. The only consequence is that you can’t complete the Thieves Guild questline or become Guild Master. For players who value gameplay convenience over quest completion, this is an easy trade.
The benefits of keeping the Skeleton Key:
- Never break another lockpick (effectively the Unbreakable perk without reaching skill 100)
- Practice on high-level locks without wasting resources
- Open any lock in the game without carrying a single regular lockpick
The downsides:
- Can’t complete the Thieves Guild questline
- Miss out on the Agent of Nocturnal powers (minor buffs granted at questline completion)
- No Guild Master title or armor upgrades
For players focused on stealth builds, the Skeleton Key is often more valuable than the questline rewards. It trivializes the lockpicking minigame and eliminates resource management entirely. Guides on RPG Site often recommend this approach for dedicated thief characters.
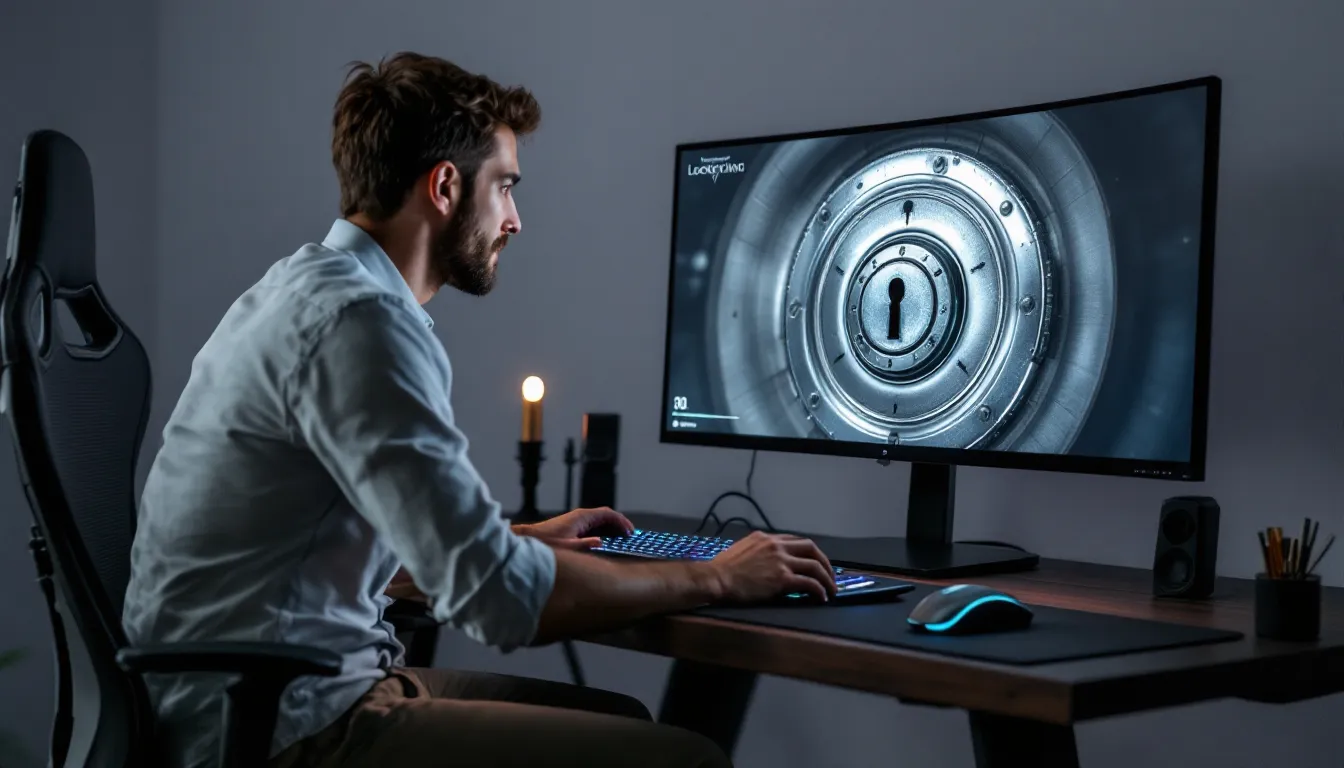
Mastering the Sweet Spot Technique
Lockpicking in Skyrim is part skill, part pattern recognition. With practice, you can find the sweet spot on most locks with 1-2 picks, regardless of difficulty.
Here’s the method experienced players use:
Start at extreme left or right. Insert your pick at one end of the lock. Try to turn. If it breaks almost instantly, you’re far from the sweet spot, move significantly (60-90 degrees) in the opposite direction.
Listen for audio cues. Skyrim’s lockpicking has subtle sound feedback. When you’re close to the sweet spot, the turning sound is smoother and less strained. Far from it, you’ll hear creaking and grinding.
Watch the lockpick vibration. The lockpick shakes when you attempt to turn the lock. Minimal shaking means you’re close: heavy vibration means you’re far away. This visual cue is more reliable than the audio on lower-quality speakers.
Use the “half-turn rule.” If your lockpick breaks after the cylinder turns roughly halfway, you’re in the ballpark. Adjust 10-15 degrees and try again. If it breaks after barely moving, you’re way off, adjust 45-60 degrees.
Work in sections. Divide the lock into thirds mentally. Test one position in each third to narrow down the general zone, then fine-tune. This systematic approach beats random guessing.
Practice on low-stakes locks. Before tackling a Master lock guarding a unique item, warm up on Novice or Apprentice locks. The muscle memory transfers.
Some players report that controller input feels slightly different than keyboard and mouse for lockpicking. Controller users often find the sweet spot by “feeling” for resistance in the analog stick, while KB/M players rely more on visual and audio cues.
Speed also matters in specific situations. During the “Loud and Clear” Thieves Guild quest, for example, you’re timed. Knowing how to quickly estimate the sweet spot without wasting picks can be the difference between success and restarting. Coverage on IGN frequently highlights these time-sensitive quest mechanics.
Common Issues When Using Console Commands
Console Commands Not Working
Sometimes the console refuses to cooperate. Here are the most common issues and fixes:
Problem: Pressing tilde (~) does nothing, or types the character into the game.
Solution: You might have a mod that remaps the console key. Check your mod manager (Nexus Mod Manager, Vortex, Mod Organizer 2) for keybind conflicts. Some interface mods from Nexus Mods can override default console access.
Problem: The console opens, but commands don’t execute.
Solution: Verify your syntax. The most common mistakes are:
- Missing spaces (“player.additem0000000A100” instead of “player.additem 0000000A 100”)
- Wrong item ID (using “A” instead of “0000000A”)
- Capitalizing in weird places (shouldn’t matter, but try all lowercase if it fails)
Problem: The command executes but no items appear.
Solution: Your inventory might be sorted weirdly, or the items went to a container instead of your character. Try:
- Opening and closing your inventory
- Fast traveling to reset the inventory display
- Using the command again with a small quantity (like 1) to test
Problem: Console commands are disabled entirely.
Solution: Some Skyrim versions or launcher settings disable console access. Check your Skyrim.ini and SkyrimPrefs.ini files. Add or modify this line in Skyrim.ini:
[General]

bAllowConsole=1
If the problem persists, verify your game files through Steam (right-click Skyrim in your library, Properties > Local Files > Verify Integrity of Game Files).
Achievement Disabling on PC
Here’s a critical detail for achievement hunters: using console commands disables achievements for that play session on PC.
This only affects the current session. If you save, quit to desktop, and reload the game, achievements re-enable. But during the active session where you used console commands, no achievements will unlock.
This is Bethesda’s anti-cheat measure. The game flags your save as “modified” when console commands are used. For players chasing 100% completion, this presents a dilemma.
Workarounds:
- Use console commands only after earning achievements you care about in that session
- Save before using console commands, then reload if you accidentally use them before an achievement pops
- Install the Achievement Mods Enabler mod (available on Nexus Mods), which re-enables achievements even with console use and mods active
The Achievement Mods Enabler is controversial in the community. Some players consider it cheating: others argue that Bethesda’s achievement-blocking with mods is overly restrictive. Your call.
Notably, this issue only exists on PC. PlayStation and Xbox versions don’t have console access, so it’s not a concern for console players.
Other Useful Skyrim Item IDs for Thieves
Since you’re already using console commands, here are other item IDs that complement a thief or stealth build. These can be added using the same player.additem [ID] [Quantity] syntax.
Arrows (for stealth archery builds):
- Iron Arrow: 0001397D
- Steel Arrow: 0001397F
- Ebony Arrow: 000139C0
- Daedric Arrow: 000139C1
Potions (stealth-focused):
- Potion of Invisibility: 0003EB41
- Potion of Fortify Sneak: 0003EB3E
- Potion of Fortify Pickpocket: 0003EB32
Thief-related materials:
- Coin Purse (doesn’t actually contain gold, but nice for RP): N/A (no specific ID: gold is 0000000F)
- Leather: 000DB5D2
- Leather Strips: 000800E4
Useful miscellaneous items:
- Soul Gems (for enchanting stealth gear):
- Petty Soul Gem (Empty): 0002E4F4
- Grand Soul Gem (Empty): 0002E4FB
- Gold: 0000000F (use
player.additem 0000000F 1000for 1,000 gold)
Quest items (use with caution: spawning quest items can break quests):
- Avoid spawning quest-specific keys or items unless you know what you’re doing
For a full list of item IDs, the Unofficial Elder Scrolls Pages (UESP) wiki maintains a comprehensive database. Search for “Skyrim Item Codes” to access the complete list.
Remember that spawning quest items or unique artifacts can sometimes break quest triggers. Stick to consumables, crafting materials, and generic equipment to avoid corrupting your save.
Conclusion
The lockpick item ID (0000000A) is one of Skyrim’s most practical console commands, saving countless hours of merchant runs and tedious inventory management. Whether you’re a completionist clearing every dungeon or a casual player who just wants to open that one stubborn chest, knowing how to spawn lockpicks gives you control over your experience.
For players who prefer immersion, the alternative methods, purchasing from merchants, looting dungeons, and joining the Thieves Guild, offer plenty of lockpicks without breaking the fourth wall. The Skeleton Key remains the ultimate middle ground: technically within the game’s lore, but functionally as powerful as any console command.
As Skyrim continues to thrive in 2026 with new players discovering it alongside veterans on their twentieth playthrough, these tools remain essential. Master the lockpicking mechanics, choose your preferred method of acquiring picks, and never let a locked door stand between you and adventure again.